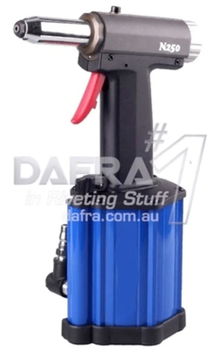
How To Use An Air Powered Rivet Gun
Master the use of air rivet guns for secure, durable connections in metalwork or repairs. Shop high-quality pneumatic rivet guns today at Dafra.
Using air rivet guns, commonly referred to as pneumatic rivet guns, is an efficient and reliable way to join materials securely. Whether you're working on metal fabrication, automotive repairs, or other projects requiring a strong and durable connection, understanding how to use this tool properly is essential.
In this comprehensive guide, we'll break down the process step by step, ensuring that you can confidently operate cordless rivet guns for various applications.
Safety First
Before diving into the specifics of using an air-powered rivet gun, it's crucial to prioritise safety. Wear appropriate personal protective equipment, including safety glasses to shield your eyes from potential debris and hearing protection to guard against loud noise generated by the air compressor. Additionally, ensure that the work area is well-ventilated to minimise exposure to airborne particles.
Choose the Right Rivets
Selecting the correct rivets for your project is a critical first step. Consider factors such as the material of the rivets, their size, and the type of connection you need. Different applications may require specific types of rivets, so consult the project specifications or guidelines to make an informed choice.
Prepare the Rivet Gun
Before using the rivet gun, ensure that your air compressor is connected and functioning correctly. Connect the air hose to the rivet gun securely. This step is vital, as the compressed air is what powers the rivet gun, allowing it to efficiently set the rivets.
Adjust Air Pressure
Check the recommended air pressure for your particular rivet gun model. This information is usually provided by the manufacturer and can be found in the user manual or on the tool itself. Adjust the regulator on the air compressor to match the specified pressure. Using the correct air pressure ensures optimal performance and extends the life of your rivet gun.
Insert the Rivet
Load the appropriate rivet into the rivet gun's nose piece. Different air rivet guns may have various loading mechanisms, so refer to the user manual for your specific model. Proper loading ensures that the rivet is securely held in place during the riveting process.
Place the Rivet
Position the rivet in the pre-drilled hole on the materials you intend to join. The alignment of the materials is crucial for a strong and aesthetically pleasing connection. Ensure that the materials are held together securely, either by hand or using clamps, to prevent any movement during the riveting process.
Hold the Materials Together
Maintain a firm grip on the materials being joined. This step is essential to prevent misalignment and ensure that the manual rivet sets correctly. The stability of the materials during the riveting process contributes to the overall quality and strength of the joint.
Activate the Rivet Gun
With the materials in place, squeeze the trigger of the pneumatic rivet gun. The trigger activates the pneumatic mechanism, causing the gun to pull the mandrel (the pin in the centre of the rivet) into the rivet body. As the mandrel is pulled, the rivet expands, creating a tight and secure joint between the materials.
Release the Trigger
Once the rivet is fully set, release the trigger. The pop rivet gun mechanism will automatically stop pulling the mandrel, and excess mandrel length will break off. This leaves a clean, finished appearance, and the materials are now securely fastened together.
Repeat as Needed
If your project requires multiple rivets, repeat the process for each one. Maintain consistent spacing between rivets, following any guidelines or specifications provided for your particular application. This ensures uniformity and structural integrity in the final product.
Inspect the Rivets
After completing the riveting process, carefully inspect the joints. Ensure that each rivet is properly set and that the materials are securely and evenly joined. Any inconsistencies or loose rivets should be addressed promptly to maintain the structural integrity of the assembly.
Disconnect the Air Hose
Once you've finished riveting all the necessary joints, disconnect the air hose from the rivet gun. This step is crucial for safety and maintenance. Additionally, turn off the air inlet compressor to conserve energy and prevent unnecessary wear on the compressor and the pneumatic rivet guns.
Shop the Air Powered Rivet Nut Gun at Dafra
Using an air rivet gun is a practical and efficient way to create strong and durable connections between materials. By following these step-by-step instructions and considering safety precautions, you can confidently operate a pneumatic rivet gun for various applications, ranging from metalworking projects to automotive repairs.
Shop the best air powered rivet gun at Dafra today. For any questions or concerns, feel free to contact us and our friendly staff will be able to assist you.
About the Author

Integral Media SEO Melbourne
Power Tools Specialist & Technical Writer
John has over 15 years of experience in the power tools industry, providing expert advice and hands-on tips...


